Showing posts with label building a tea pot. Show all posts

Monday, February 21, 2011

A TEAPOT FOR DOWN UNDER ...

I was commisioned by a couple from Melbourne, Australia to create a teapot and pair of his and her cups as a house warming gift to themselves. They are moving into their new home in mid-April. After several conversations about size, shape, color... and a sketch, we had a plan.  I did warn her that the kiln has the final say and I would do all I could to make it work. She understood and off I went.
I started with throwing the body, spout (not shown), lid and a pair of cups... plus an extra. I'll make/pull the handles later. I let these parts stiffen up a bit to what we call leather hard. What follows is a rough tutorial on teapot making, adding a few techniques and tricks I use to create one. I hope you like it.


Now I'm cutting and test fitting the spout to fit the profile/curve of the body. You can see my chamois on the edge of the bucket is attached to a cork so I don't lose it in the water and that's the top of a fish aquarium heater in my water bucket so my water isn't cold during the winter. I also use a mirror to see the profile of what I'm throwing so I don't have to bend to the side all the time. I had a bad auto accident many years ago and my lower back needs a little help.


Once the spout fits well, I traced around the spout so I would know where to put the strainer holes.


I started to drill the holes and I'll smooth and bevel the holes later with this tapered "plug".


Now I'll "score and slip" the two pieces together using a piece of comb and slip/wet clay.


I add this tapered coil of clay under the lip of the spout and smoothed it in place. This creates a lip that will stops drips from ... well... dripping. The drips won't go "uphill".


I put a vent hole in the lid and added a pulled handle, adding a coil to each side as a decorative feature. It also gives the handle the needed thickness to look balanced visually.  I have bent the handle to compliment the swirl I added to the body of the teapot. I also filled in the juncture of the handle and and spout so there would be a nice "flow" from one into the other. I like how the undulated foot compliments the swirl and handle angle. I could have made the opening of the spout a bit higher, adding a couple of ounces of capacity to the teapot, but I like the looks of it where it is. Also the angle of the spout opening compliments the angle of the back of the handle on the right side. These are some of the considerations I think of when designing the piece. It's like a sculpture to me.


I'll keep you posted on the progress of this teapot in future posts as I go through the glazing, firing and finishing of it.  Cheers...

Sunday, July 4, 2010

A NEW THIS ... and a NEW THAT...

Just wanted to show you some brushwork I'm trying again. The tricky part is getting it hot enough without too much ash to obliterate the designs. Placement in the kiln is everything... well very, very important anyway.  Last time I tried it, I ended up with too much running.  I know this type of work is usually saggered... but, I gotta' try it this way.


Next new thing I'm going to try is making my own handles. I have been making grape vine handles from vines on the edge of the woods. There are three for starters.


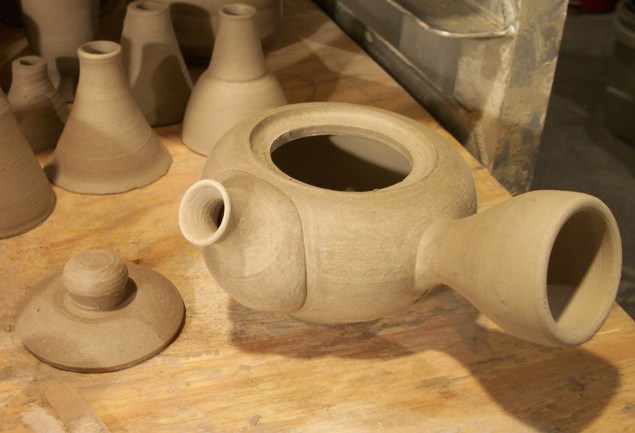
 This is a very small kyusu that should hold about 5 oz, good for gyokuro.


I did some handbuilding too... A sake set made out of slabs, before glazing...


... and after glazing with a couple more pieces.


Back to glazing... and a couple more experiments.

Tuesday, June 22, 2010

TWO FOR TEA

I haven't blogged in a long time, I have been getting a ton ready for my next firing at the end of the month. I have made an extra effort to create more and accurate tea ware.  What I mean by accurate, is making teapots for instance, just the right size. I was making "nice sized ones" but I was not aware of the specific sizes desired by tea drinking connoisseurs. I now know that they like 3-4 oz tea pots for making 2 oz of high quality tea (gyokuro) and these small ones are called kyusu or a houhin. Then they get big for sencha, like a  9 oz tea pot is nice. This will make two smaller pours or one bigger one. 

A completed small one on the right and a 9 oz one "scored and slipped" on the left ready to join. Parts in the background to choose from. A little more practice with composition in this scale and I'll know what size to make them. I made a total of five tea pots for starters.  I want to see if they shrink to the right size.


This is a close-up of the prep work. Don't make the holes too big or they won't strain well and not too small or it will pour slow and continue to steep the tea (too long).


Then you press them together with wiggles to make the slip ooze out. Then you know it won't crack under firing stresses. Clean it up with a bristle brush and voila!


A completed small kyusu. It will hold about 5 oz when done.


The tea bowls are good to have half again to twice the size of the serving. A 6-8 oz capacity tea bowl holds 4 oz of tea nicely and so on.  I have gotten most of this tutorial from a good customer of mine named Brian that lives in Colorado.  Thanks Brian!  He doesn't know it (until now anyway) that he will have a little thank you in his next order. Here are a few I threw "off the hump".


This pic has a shui fan for a custom order and some tea caddies.


Shui Fan opened up.