Showing posts with label manabigama. Show all posts

Friday, August 31, 2012

KILN REBUILD

I've been plugging away at the kiln site. I have had to stop to get more bricks, silica sand and Hawthorn 40 fire clay for the mortar, etc.  I do have some pictures of the latest progress I've made. 
 Gate from above. There will be removable grate bars for the whole door width front to back, I have the just the front half removed here. I will be able to just walk in to load the kiln.


Door arch is done.


 First support...


 Support frame ready for lath.


Lath on and wall started.


Fire box door frame with pavers.


 Door arch and chamber arch in place. I'll cut and fill the gaps on each side, after. Super duty's on the inside and IFB's on the outside.


 Walls going up, both sides at the same time. I've got angles to the pavers for iron framing to grab on. I have approx. a 5/8" gap between the wall and the chimney filled with Kaowool to allow for the expansion of the bricks.


You can see how high the back top of the old chamber was. With this taper, I will keep the back hot with out over firing the front. 


Sunday, August 19, 2012

More progress on the kiln rebuild...

I have more done on the enlargement and reshaping of my manabigama. I had all the excavating done and was ready for stone dust base to put my concrete blocks on.  I took my time and got them all leveled up and ready for the expanded steel mesh or lath as some masons call it.                      


Now I started the layout, in brick as I had everything done on paper, making room for my shelves and the firebox. I made the necessary adjustments and it's looking good.  I moved the level for the grates up one brick as I know it's good to leave enough room for lots of glistening embers without choking the primary air intakes.


Now i can get the brick saw and make up some special mix mortar consisting of 50% fireclay and 50% grog. I'll make it the consistancy of peanut butter for troweling and like a milkshake for dipping. It will setup nicely when we fire. No Portland cement on the inside of the kiln though. I will add 10% to the outside's insulating coating (as a binder) of the course sawdust, fire clay, vermiculite and sand mix.  I will also use chicken wire to hold the insulation together as it will crack. 


I will remove the placed bricks and "mortar" them in place. This was a "dry run" to make adjustments where needed and get the layout right.

Saturday, March 12, 2011

BAMBI (OR BAMBETTE) RETURNS... (THE STORY VERSION)


Quite a while ago, I had a picture of this fawn on my blog, bedded in the thicket next to my house. I have thought of the encounter often. So..."What about it??" you say... well here's my story. Once upon a time, I built a wood-kiln. Not a huge one, but one I could fire by myself.  I have been spending all of my "clay time" making pottery to fill this kiln so I can learn how to fire a wood-kiln. I now have fifteen firings under my belt and I feel pretty confident that I have a good grasp on it. I have to admit that I didn't spend as much time on some of the work as I would have liked to, but I didn't want to waste "clay time" on a poor firing. Understandable. I remember not being able to get past cone nine until after my third firing. I can now get to twelve in no time... I actually hold the kiln back now for the results I want. So, what does this have to do with the fawn!!?? Talk about dragging it on and on ... So, now that I am confident with the kiln, I have been putting more time into the pieces. I was a sculpture minor in college and have missed sculpting and now I have been doing more sculptural pieces for the next firing. I have sculpted objects on top of pottery, sculptures all by themselves and I just finished a serving dish with a fawn bedded inbetween the logs on top of it. I am working with a fettling knife in the first picture, carving details in a log.


I want the end of the log to look old and weathered...


And have the bark peeling away... and a good shape for a handle.


Add a few shale/limestone rocks like there is poking though the forest floor up in my woods...
A bed of leaves to keep dry on... Bambi has returned, just in clay form.


I also made some casseroles with a simpler fawn, this particular one is a mule deer fawn...


So... looks like I'm starting to get my sculpture "fix" now, and it looks like the snow is melting some.  I've had enough winter. There was three feet of snow out there just one week ago! Closed all the schools in the area.


Guess what I was doing? ... besides the driveway...


Looking forward to firing soon. I have enough for a kiln full now, just need to melt some snow.
And, I have some more teapots, couple with the birds I've been seeing at the feeder every day...


THE END

Tuesday, January 25, 2011

I SLIPPED.......


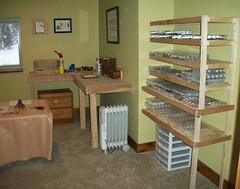
 I slipped .... in more ways than one. I slipped into overdrive over the holiday season. Glad that's past. Busy with shows, the usual - set 'em up, work some hours, take 'em down, put away. I slipped some wood into a now empty bedroom and "arrainged them" into a studio for Mary Ann's growing bead and jewelry business. Here are the results before she started and after two hours of breaking it in. Glad she likes it.


 I slipped back into some throwing again, made a few boards of teaware, mugs and tumblers (my boards are 18" x 24"... worth mentioning as I know a lot of potters think of a board as 6" wide by 24" or more long.) 


I slipped a peek out the studio window at my kiln, as it patiently waits for me to fill it. Looks nice, even in the winter.


And I slipped some molds I picked up at an estate sale and I have been experimenting with some small molds of animals. I slab built the cart to go with them (whatever they are now) and temporarily secured the pieces with some bead wires from my wife's new shop. I did some research about making a slip from your own clay body and after a bit of a learning curve, I got it straight. Get the specific gravity right, then add sodium silicate/Darvan to make it pour well. I've always wanted to try adding some slip cast elements to my thrown and altered work.  I have wanted to do some sculptural work for a long time (my minor in college) and have some ideas that I am going to put in motion.


Now I won't mention anything about going down to the studio and putting on Jimmy Buffett's song "Slip Sliding Away..." but I will mention the winter roads get really slippery when it hits -14* like it did on Monday and I was slipping and sliding on my 40 minute commute to work ... 

LMAO!!!    I slipped again!!  Did I say Jimmy Buffett's song??? I meant Paul Simon!! I think my oldies recollection skills need sharpening! Hope I don't slip and cut myself while sharpening... 

Tuesday, June 22, 2010

TWO FOR TEA

I haven't blogged in a long time, I have been getting a ton ready for my next firing at the end of the month. I have made an extra effort to create more and accurate tea ware.  What I mean by accurate, is making teapots for instance, just the right size. I was making "nice sized ones" but I was not aware of the specific sizes desired by tea drinking connoisseurs. I now know that they like 3-4 oz tea pots for making 2 oz of high quality tea (gyokuro) and these small ones are called kyusu or a houhin. Then they get big for sencha, like a  9 oz tea pot is nice. This will make two smaller pours or one bigger one. 

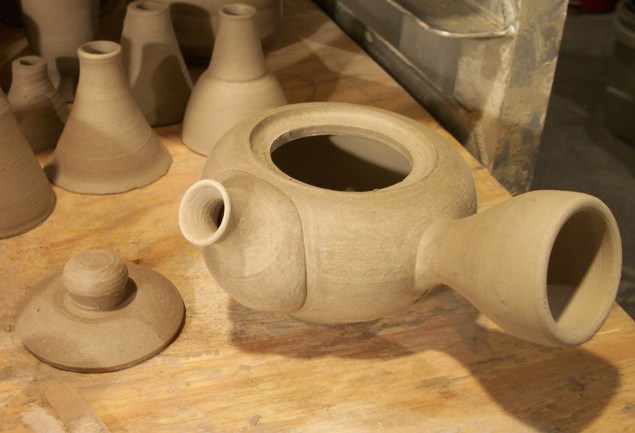
A completed small one on the right and a 9 oz one "scored and slipped" on the left ready to join. Parts in the background to choose from. A little more practice with composition in this scale and I'll know what size to make them. I made a total of five tea pots for starters.  I want to see if they shrink to the right size.


This is a close-up of the prep work. Don't make the holes too big or they won't strain well and not too small or it will pour slow and continue to steep the tea (too long).


Then you press them together with wiggles to make the slip ooze out. Then you know it won't crack under firing stresses. Clean it up with a bristle brush and voila!


A completed small kyusu. It will hold about 5 oz when done.


The tea bowls are good to have half again to twice the size of the serving. A 6-8 oz capacity tea bowl holds 4 oz of tea nicely and so on.  I have gotten most of this tutorial from a good customer of mine named Brian that lives in Colorado.  Thanks Brian!  He doesn't know it (until now anyway) that he will have a little thank you in his next order. Here are a few I threw "off the hump".


This pic has a shui fan for a custom order and some tea caddies.


Shui Fan opened up.

Sunday, May 23, 2010

Campfire / Forest Fire Thing ... Part III

The Winners of the giveaways are:  Dawn for the mug and mywifesstudio for the yunomi. Congrats to them and I hope everyone had fun.  Contact me at williperri@aol.com with your name and address and I'll ship them out to you!  :-]


Now for some close ups...


 It was a nice firing and a great time... they came back to pick theirs up on Saturday Morning. Everyone was real pleased with the results! We will have them back next year, same time.

Thursday, May 20, 2010

The Campfire / Forest Fire Thing, Part II

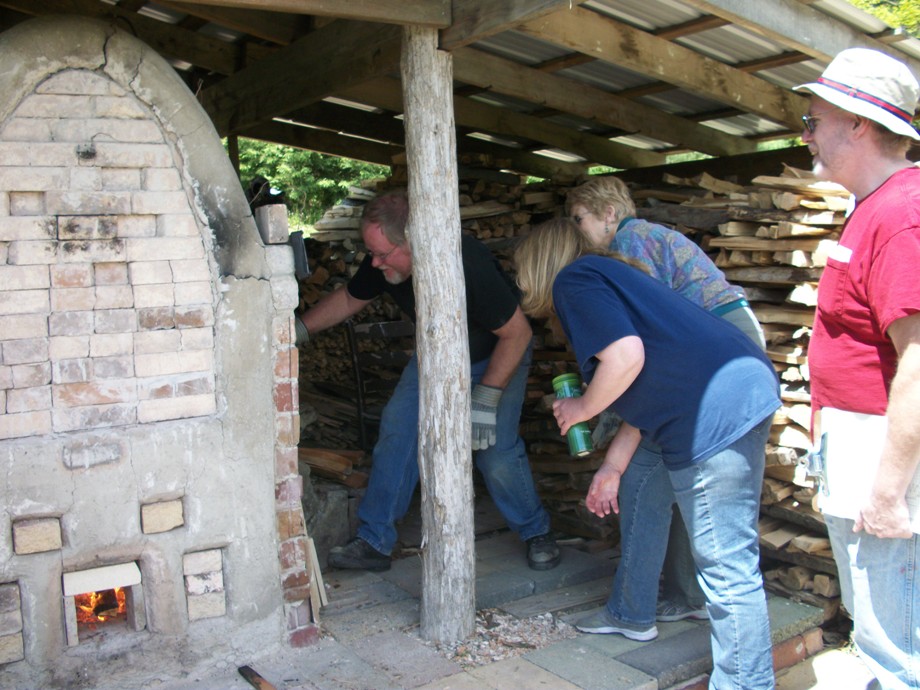
Back to the wood-fire workshop posting. A view of the rest of the great weekend we had. We finished bricking up the door, using my trimmings that hit the floor for mortar.


A view of the pre-fire kiln ...

Because we glazed the day before and loaded "right after", I candled the morning of the firing starting at 6 am for about 3 1/2 hours to gentlly finish drying the ware.


A little bit of stoking... and stoking... and stoking...


And a view of the finished pieces...


One of the many beautiful pieces...


A happy crew...