Monday, February 21, 2011

A TEAPOT FOR DOWN UNDER ...

I was commisioned by a couple from Melbourne, Australia to create a teapot and pair of his and her cups as a house warming gift to themselves. They are moving into their new home in mid-April. After several conversations about size, shape, color... and a sketch, we had a plan.  I did warn her that the kiln has the final say and I would do all I could to make it work. She understood and off I went.
I started with throwing the body, spout (not shown), lid and a pair of cups... plus an extra. I'll make/pull the handles later. I let these parts stiffen up a bit to what we call leather hard. What follows is a rough tutorial on teapot making, adding a few techniques and tricks I use to create one. I hope you like it.


Now I'm cutting and test fitting the spout to fit the profile/curve of the body. You can see my chamois on the edge of the bucket is attached to a cork so I don't lose it in the water and that's the top of a fish aquarium heater in my water bucket so my water isn't cold during the winter. I also use a mirror to see the profile of what I'm throwing so I don't have to bend to the side all the time. I had a bad auto accident many years ago and my lower back needs a little help.


Once the spout fits well, I traced around the spout so I would know where to put the strainer holes.


I started to drill the holes and I'll smooth and bevel the holes later with this tapered "plug".


Now I'll "score and slip" the two pieces together using a piece of comb and slip/wet clay.


I add this tapered coil of clay under the lip of the spout and smoothed it in place. This creates a lip that will stops drips from ... well... dripping. The drips won't go "uphill".


I put a vent hole in the lid and added a pulled handle, adding a coil to each side as a decorative feature. It also gives the handle the needed thickness to look balanced visually.  I have bent the handle to compliment the swirl I added to the body of the teapot. I also filled in the juncture of the handle and and spout so there would be a nice "flow" from one into the other. I like how the undulated foot compliments the swirl and handle angle. I could have made the opening of the spout a bit higher, adding a couple of ounces of capacity to the teapot, but I like the looks of it where it is. Also the angle of the spout opening compliments the angle of the back of the handle on the right side. These are some of the considerations I think of when designing the piece. It's like a sculpture to me.


I'll keep you posted on the progress of this teapot in future posts as I go through the glazing, firing and finishing of it.  Cheers...

Saturday, February 12, 2011

STONE QUARRY HILL ART PARK - WINTERFEST 2011, WOOD-FIRED RAKU

We had the Syracuse Ceramic Guild's Winterfest-ivities today. Folks from all over Central New York came to Stone Quarry Hill Art Park in Cazenovia, N.Y. for a day of snow filled activities. There was lots of sledding down the big hill that the Art Park sits on. Inside the barn was hot chocolate, coffee, snacks, etc. and Denise and Sheila helping visitors with the un-frozen raku glazes.
There was a core crew of four of us, braving the blustery cold winds to fire our almost new, wood-fired raku kiln. "Double D" Dave, Dave "L" and me on the right, are prepping for the start while Sabrina took a minute to help prepare things inside. Wood splitting, unthawing and pre-heating the bricks took a bit of time to do.


Here's "Double D" Dave ('cause his last name starts with D and the other Dave's last name starts with L) splitting some wood in anticipation of the high temps we needed later. We fired to approximately 1850* F


Here's two of the kids glazing, I think the lens fogged up coming in out of the cold, as a few more rest in the background, and when the pots come out, we preheat them a couple of minutes to finish drying them, as they're freshly glazed pots.


Now the firing takes about fifteen minutes to get to temp, then I remove the door, we take the still glowing, orange - hot pots out with long tongs and place them in a trash can that has a few inches wood shavings in it, throw a big hand full of shavings on top of the pots and then Sabrina quickly pops the lid on while the shavings are still burning to create a smoke filled can. The glazes are molten at this time and will be affected by the changes in the atmosphere. We are reducing the amount of oxygen (why we call it "reduction") and increasing the amount of carbon particles, which in turn affects the looks of the clay and glazes (creating surface lusters, crystals and keeping copper and iron from returning to it's oxidized state which would change the color dramatically).


Maybe I should have titled this post " A Raku Tutorial - Winterfest Edition "

Tuesday, February 1, 2011

This is for the birds...

It really IS for them.  I  like birds and almost all animals for that matter.  I enjoy it when we get cardinals at the feeder, along with the blue jays and other assorted birds of the winter.


Then there are the eagles, no... not at the feeder, but on the shelf drying in the studio. Last post, I talked about experimenting with a slipped version of my clay body. I had this cool eagle mold that looks like an antique, and I like antiques, that I have always wanted  do someting with. So I cast a couple of them and slab built a base for one with some patriotic American Pride, emphasising the American " I can " attitude.


Then there's some more birds again!  A woodpecker/duck character with a big mouth and a duck that thinks he's an elk, or reindeer or something. That reindeer costume he put on isn't fooling anyone. He will be pulling a dog sled with the woodpecker/duck in it for that one.

 I realized I needed to get serious again so I made a modified batch of "Tully clay" and made some things with that to try in my next firing. I added a little more stoneware and fireclay to hopefully relieve some of the small bloating and sagging issues I am still having in some zones of the kiln.  I have a good cone 9 body but I want a "Tully clay" mix for cone 10 too. I have marked these pieces with a "T".


 I get throwing a few mugs and find myself wanting to try a new combination of castings again.


A turtle with a mohawk (I have a couple of students with mohawks lately- one student, Dimitri, with orange-red hair, jelled straight like the turtle has), a masked mice hobo, another confused identity, reindeer/duck for another wheeled something... but no birds. Not for the moment, anyway... I have two more bird characters under construction... This IS for the birds. I have pottery orders to fill.


Tuesday, January 25, 2011

I SLIPPED.......


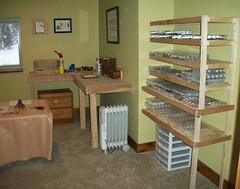
 I slipped .... in more ways than one. I slipped into overdrive over the holiday season. Glad that's past. Busy with shows, the usual - set 'em up, work some hours, take 'em down, put away. I slipped some wood into a now empty bedroom and "arrainged them" into a studio for Mary Ann's growing bead and jewelry business. Here are the results before she started and after two hours of breaking it in. Glad she likes it.


 I slipped back into some throwing again, made a few boards of teaware, mugs and tumblers (my boards are 18" x 24"... worth mentioning as I know a lot of potters think of a board as 6" wide by 24" or more long.) 


I slipped a peek out the studio window at my kiln, as it patiently waits for me to fill it. Looks nice, even in the winter.


And I slipped some molds I picked up at an estate sale and I have been experimenting with some small molds of animals. I slab built the cart to go with them (whatever they are now) and temporarily secured the pieces with some bead wires from my wife's new shop. I did some research about making a slip from your own clay body and after a bit of a learning curve, I got it straight. Get the specific gravity right, then add sodium silicate/Darvan to make it pour well. I've always wanted to try adding some slip cast elements to my thrown and altered work.  I have wanted to do some sculptural work for a long time (my minor in college) and have some ideas that I am going to put in motion.


Now I won't mention anything about going down to the studio and putting on Jimmy Buffett's song "Slip Sliding Away..." but I will mention the winter roads get really slippery when it hits -14* like it did on Monday and I was slipping and sliding on my 40 minute commute to work ... 

LMAO!!!    I slipped again!!  Did I say Jimmy Buffett's song??? I meant Paul Simon!! I think my oldies recollection skills need sharpening! Hope I don't slip and cut myself while sharpening... 

Saturday, December 25, 2010

New Work

I've had a very busy fall/winter.  I had a couple of shows including a two month long holiday "store" called Art Mart in Syracuse, NY.  We pay a "booth fee", work 15 hours during the duration of the show and pay a reasonable percentage of our sales. Etsy sales have been steady and I have helped my very talented wife with a few of her custom orders.  The most recent one was for a returning customer that has sled dogs. We did some pendents for her last year. Here's Bonnie practicing for a race. Pretty cool. And then the ordered pendents.


I guess she liked these because this year she ordered Christmas tree ornaments, five sets no less. Mary Ann said she was going to give four away to her sledding friends and keep one for herself.  My wife found some husky pictures and I carved them out for her adding a bas-relief (low relief) to them. A bit of work, but pretty neat none the less. She does most of her work in porcelain, and her usual great job of glazing.


I say most of her work because she gets experimenting with my stoneware for her batches of  wood-fired beads that she will include in my firings and lately she has used my "Tully" clay for beads and gotten some really cool results. If you misses the Tully clay post, it's only a half dozen posts back.


She is showing the Tully clay beads in her post on Monday on her blog if you want to check it out. She is the serious blogging and posting artist in this house. Here is the link for her blog.

Saturday, October 2, 2010

NEXT CYCLE ... plus

... plus a finished entertainment center :-)  Nice to have that done.  Not that I didn't enjoy the project, I like woodworking, I just wanted to get going on my next throwing cycle.  Mary Ann finished it with 3 coats, and it is starting to show signs on darkening already.  Eventually it will match the fireplace wood which is 3 years old now.  The sunlight ages cherry and darkens it to a nice patina of sorts. I included some of the details from the fireplace mantle in the entertainment center.  Rectangles of wood near the top corners... stuff like that.  I used rectangles of wood on the window trim too ( Craftsman style ).  The cherry picks up on the stone colors nicely. That's not real stone either! Not too bad for fake, a lot lighter too to install too.  I did a decent amount of stone and brick work for customers before, and now it pays off as "practice" for building my own home. 


Started throwing again... teaware (teabowls,teapots...) and some mugs I just finished putting handles on. And one more pulled teapot handle. I like the way the handle detail flows into the spout angle too. Back to the studio.

Friday, September 10, 2010

ONE PROJECT DOWN...

And 999 to go... I finished the entertainment center I showed you a little of last time I posted.  Here's a couple of views. I just need to sand and take the diagonal brace off. Mary Ann is going to varnish it.


And... speaking of views, I caught this one a little later in the day.